Occasionally, you may have trouble in importing .m4v video file to iMovie for editing. Spend a little time the reference of iMovie, you will know that .m4v with the H.264 video codec which is not supported by iMovie, and that's why you fail to edit M4V in iMovie from time to time. In light of this, if you want to transfer M4V videos from your iTunes or something to iMovie for editing, you should convert the M4V file to iMovie acceptable format like ProRes MOV by using third-party M4V to iMovie Video Converter for Mac. For illustration, here's the detailed tutorial.
![]() Secure Download
Secure Download
![]() Secure Download
Secure Download
First off, click the "Free Trial" button to download the program installation package, follow the installation wizard to set up the converter, and then run the program immediately.

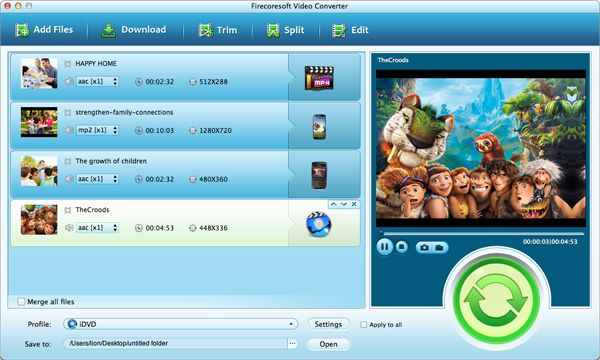
This converter supports almost all video formats besides M4V. Therefore, you can just throw whatever videos into the program for converting. To add source video file, you can drag and drop the M4V file directly into the program, or, hit the "Add Files" button to load the file into the workbench window. After importing, you can click the "Play" icon to preview the video.
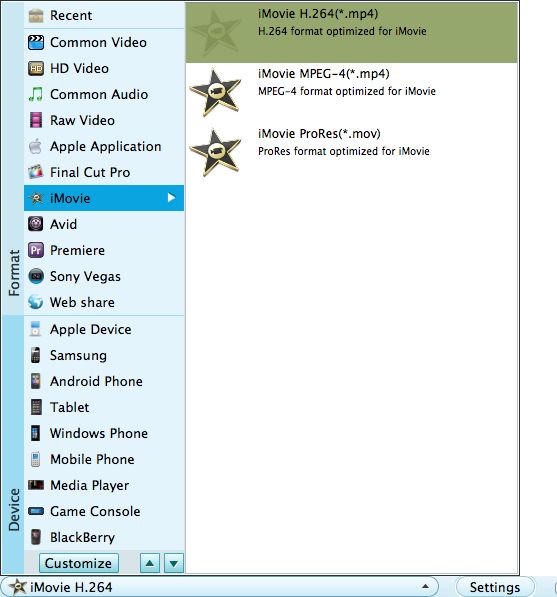
Press the "Profile" menu bar to open the output format list. Right there, you can find lots of popular video formats and optimal presets. To transcode M4V to iMovie, you should navigate to the "iMovie" section, and then choose "iMovie ProRes(*.mov)" as the output format. Alternatviely, you can choose other formats such as "iMovie MPEG-4(*.mp4)" or "iMovie H.264(*.mp4)" as per your need.
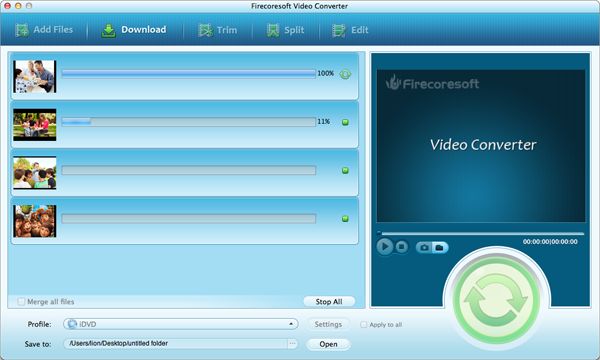
If you would like to spiff up the source M4V file, you can make use of the built-in editing features such as crop/trim videos, apply special effects, customize parameters, etc. If you don't find it necessary to do the editing, you can skip it and press the "Start" button to get the conversion from M4V to iMovie started. Once the conversion is finished, you will find the output file in the specified location. Afterwards, you can import .m4v into imovie for editing without format limitation.
What's Next
![]() Secure Download
Secure Download
![]() 30 Day Money Back Guarantee
30 Day Money Back Guarantee


Browser compatibility : IE/Firefox/Chrome/Opera/Safari/Maxthon/Netscape
Copyright © 2014 Firecoresoft Studio All Rights Reserved