Life is beautiful with many joys and happiness. There are countless precious moments which're worth recording by cameras as memory. However, there is various suddenness as well. Let's say, the photos taken by the camera were deleted accidentally. Gosh! We cannot help getting mad as soon as we realize what a stupid thing we had done!
"Hi, can anyone help? I can't get my photos of my SD from my camera, it keeps coming up errors, it's got all my photos of my kids & my wee girls first photos when she was born 11 months. Is there any chance I can still get them? How can I recover photos from SD card, please?"--Jenna Smith
"I took about a hundred pictures with my Fuji 2400Zoom camera. They were stored on a 64MB Smart Media chip. I accidentally erased all of the pictures without realizing it. Are my hundred pictures gone forever? Is there any way to recover or undelete them?"--Jackson
Yeah, perhaps a camera store can help to get back deleted photos, but believe me, no one would like the cost which's incredibly high. Now what? Any alternative to recover photos from SD card? Definitely yes, here comes Firecoresoft Dr. Sospito--the professional data recovery software. Called as a "doctor", this software is specializing in recovering various lost data (videos, photos, music, documents, email, etc) which’s accidentally deleted or formatted from Windows-based hard drive or external devices such as SD card, USB drive, etc. Why not spare a little time to check out how to get back deleted photos from SD card by this magical software.
Here is how to carry out the rescue with the help of Firecoresoft Dr. Sospito.
![]() Secure Download
Secure Download
![]() Secure Download
Secure Download
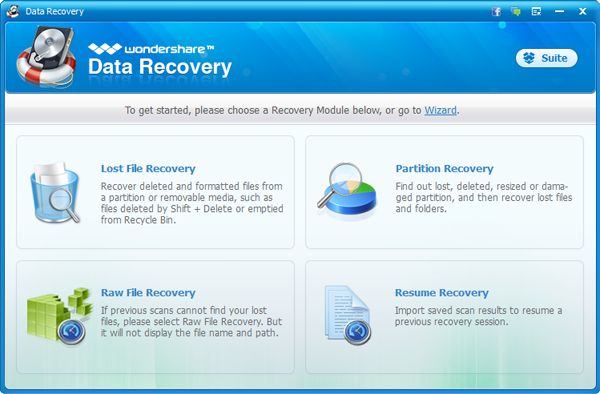
When you are running the software, you will enter the interface automatically. There, you can see four recovery modes--"Lost Data Recovery", "Raw Data Recovery", "Resume Recovery" and "iPhone Recovery from iTunes". Each of them has specified functions. In our case, we would like to conduct photo recovery from SD card, therefore, we will choose the first mode "Lost Data Recovery".
Once chosen the recovery mode, you will be guided into a new interface. It takes the software a little while to search all the devices installed on the computer. You can see all found devices listed on by one, then use your mouse to look for your SD card from the list. Once found out, click it and press the "Search" button on the top of the tool bar, the software will start the scanning automatically.
While the software is conducting the scanning work, you can see the results scanned out at the same time. You can choose the specified one for preview to see if it is the right one that you would like to restore. If you would like to get back all of the deleted photos, please select ALL images, click the "Stop" menu bar then press the "Recovery" button. Afterwards, you will be asked to designate a position for saving the recovered files. Have determined the location, the program will start to recover all selected files. Generally speaking, the larger the files sizes are, the longer it takes to finish the recovery. Once the job has been done, It is suggested not to save the files to the SD card any more. Instead, you can store them in a folder in your computer. Open the folder and you will see all retrieved photos. Isn't it exhilarating?


Browser compatibility : IE/Firefox/Chrome/Opera/Safari/Maxthon/Netscape
Copyright © 2014 Firecoresoft Studio All Rights Reserved