As is well acknowledged, the Notepad is one of the important text editors. Thanks to its great features such as small size and strong compatibility with almost all OS as well as popular handheld gadgets (mobile phone, psp, MP4, etc), it is widely used by many people. The fact is that some programmers even use it to write the batch processing/configuration files, saving them in the extension ".txt" text file.
From time to time, we will make mistakes unintentionally. For instance, "I have written some important configuration text files, but I stupidly deleted it on my computer." Surely, it is terrible to lose something important because of our carelessness. But it is no use crying over the spilt milk. Instead, we should try to find a remedy to get back deleted text from computer. Delightfully, the high-end technology makes almost everything possible and to recover deleted text is no longer a difficult task. Firecoresoft Dr. Sospito -- professional data recovery for Windows (data recovery for Mac) is one of the software capable of doing text recovery job efficiently. Its name said it all that it is specializing in recover various lost/deleted files covering Word documents, Notepad, Adobe Acrobat files (PDF), etc. Honestly, to recover deleted text with this smart text recovery software is an easy job requiring several mouse clicks.
The detailed how-to will show you every step to get back deleted text from computer by Dr. Sospito on Windows platform.
![]() Secure Download
Secure Download
![]() Secure Download
Secure Download
To get started, we need to download the data recovery software, set it up to the computer, and then run it. Please note that you should get the Mac version if you would like to conduct the deleted text recovery on Mac.
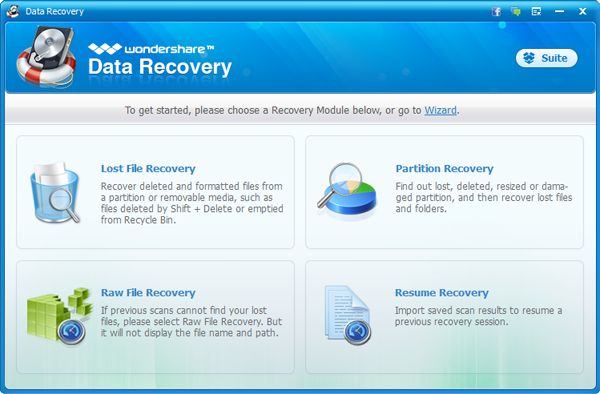
Once you run the software, you will see its interface as below. Based on our needs, we should select the "Lost Data Recovery" mode to proceed the recovery.
In front of you is a new window with all existing computer disks displayed clearly. Choose the disk that you have deleted the text before, and then click the "Search" button on the tool bar. The program will begin to scan the disk thoroughly.
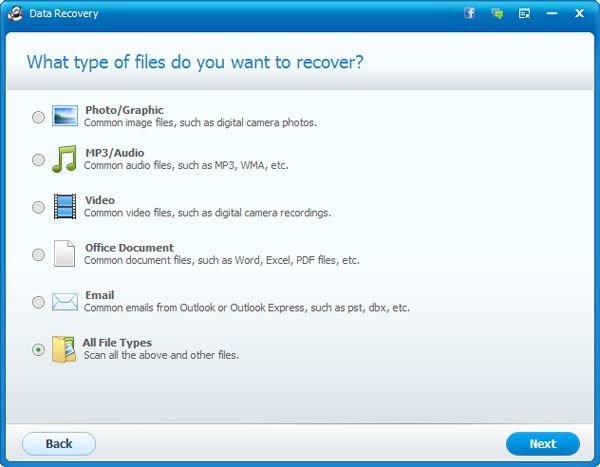
By the way, if you want to save time, you can narrow the search by pressing the "Filter" button, afterwards, a "File Type" list will appear. You can select "Document" columns only, click the "OK" button and then press the "Scan".
As the scanning is in progress, the files/texts which have been scanned out will be shown in the interface. You can see the file/text names, size and the create time. When you left-click one of the text, you will see its content on the upper part of the interface, so that you can determine whether it is the one you want to recover or not.
To get back deleted text from computer, you just need to press the box before the thumbnail, then hit the "Recovery" button. You will be required to designate the path for saving the recovered texts. Remember not to save the text to the disk where it was deleted before. Now that the location has been set, simply click the "OK" button and the program will do the rest automatically.


Browser compatibility : IE/Firefox/Chrome/Opera/Safari/Maxthon/Netscape
Copyright © 2014 Firecoresoft Studio All Rights Reserved