It is said that "more photos are taken with the iPhone than any other camera". There are some fans using iPhone as the primary camera. However, the undesirable trouble will trouble them sometimes, namely the photo data lost due to improper or halted synchronization, iPhone lost or stolen, accidental deletion, etc. The following questions are most commonly seen on the internet:
1.How can I recover deleted pictures? Is there a recycle bin with iPhone 4?
2.I accidentally deleted photos in the camera roll on iPhone 4S. Is there a trash bin on the phone that you can retrieve deleted photos from iPhone, please?
3.My friend has deleted some pictures which were recently taken. Those were really important for me so I want to get them back again. Is there any procedure for doing the same?
Yes, it would be great if iPhone has got a trash bin, so that we can retrieve deleted photos from iPhone with several clicks. Let's stop daydreaming now. Seriously, what is the workaround to recover photos from iPhone? Perhaps a powerful iPhone photo recovery tool will do us good. Firecoresoft Dr. Sospito -- Mac data recovery is such a qualified tool in every respect. Getting extremely creative with its name, Dr. Sospito for Mac is an easy-to-use data recovery program capable of helping to recover photos from iPhone (iPhone 5/4S/4, etc.) easily.
A detailed guidelines will clarify how easy it is to use this recovery software.
![]() Secure Download
Secure Download
![]() Secure Download
Secure Download
Before starting the recovery job, it is necessary to download the software, install into the computer and run it.
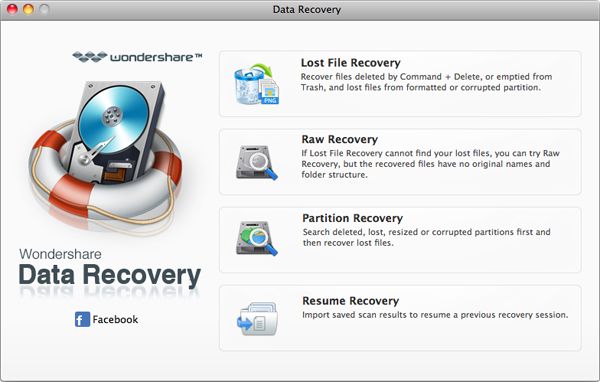
After entering the interface, you will see four recovery modes there--"Lost Data Recovery", "Raw Material Recovery", "iPhone Recovery from iTunes" and "Resume Recovery". In our case, we should choose the "iPhone Recovery from iTunes".
After choosing the recovery mode, all existing iTunes backups on your Mac will be shown in a new window. Choose the proper backup as per your need, then press the "Scan" button. The smart data recovery program will begin the scanning automatically.
As soon as the scanning is finished, you will see all files being displayed according to the categories such as "photo & vidoes", "contacts", "message" and "notes", etc. Press each category, you can preview the contents clearly. In order to get back the lost photos, you can choose the "photo & vidoes" cloumn and then press the "Recovery" button on the tool bar. After that, a new window will show up, requiring you to customize the location to save the recovered photos.


Browser compatibility : IE/Firefox/Chrome/Opera/Safari/Maxthon/Netscape
Copyright © 2014 Firecoresoft Studio All Rights Reserved