"Ack! My annual report has gone!" Well well, most people have been there at some point--carelessly delete the wrong version of a file, hit the "delete" button accidentally and empty the Trash Bin afterwards before realizing that you want to keep the file. In either case, things just happen and the file is gone. You may complain, sulk or even want to break your PC. You think that there is no way to retrieve deleted files to Mac, do you? Not exactly! There is a great chance to get your files back. The premise is that you have got the powerful file recovery software Mac offering sufficient help.
When searching the Internet, you can find lots of file recovery software capable of doing the job. "Which one should I choose then?" you may be confused. Firecoresoft Dr. Sospito -- powerful data recovery for Mac (data recovery for Windows) is really worth a try. It can automatically scan and recover all lost/deleted/formatted files which have not yet been overridden. With Dr. Sospito's help, to retrieve deleted files to Mac is nothing more than a point-and-click job. You don’t have to be a brainy computer nerd since the operation of this file recovery software Mac fairly easy.
The following guidelines are specially written to show you how to recover files to Mac by this foolproof file recovery software. Although the guides are based on Mac platform, they can also be taken as reference for Windows.
![]() Secure Download
Secure Download
![]() Secure Download
Secure Download
To get started, we need to do some preparation. Click the download button above to download Firecoresoft data recovery for Mac. Then, set it up on Mac and launch it. Please note that you should get the Windows version if you are running Windows.
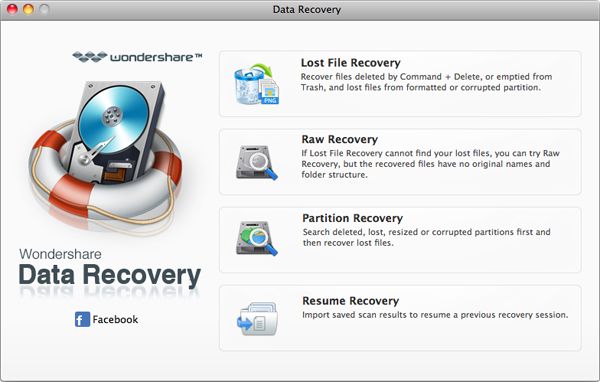
This file recovery software Mac provides four recovery modes for optional use. You can view the description of each mode and then choose the one best suit your need. This time, we will pick the "Lost Data Recovery" mode.
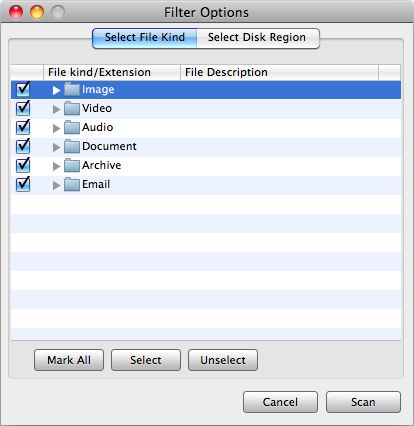
Once chose the recovery mode, you will enter a new window, where all of the existing disks are displayed. You need to choose the one where the files have been deleted. That is to say, if you deleted the files on disk "D:", you should choose "D:" and then click the "Scan" button on the tool bar. The program will start to scan the recoverable files automatically. By the way, you can hit the "Filter" button and choose the file types that you want to scan instead of the whole disk. For example, you can choose the "Document" column only. During the scanning, you can pause or stop it by pressing the corresponding buttons. Please note that clicking the "Save Scan" button, you are able to save the scanned files for the resume scanning later.
When the scanning is finished, you can see the scanned files are displayed on the left panel of the interface. When you are clicking any one of the files, you can see its contents on the upper of the interface.

Once you have determined which file needs to be recovered, you should press the "Recovery" button on the tool bar. Afterwards, you need to designate the location to save the recovered files, and then click "OK". Remember not to save the files to the disk that you have deleted them before. Wait patiently and you will get the files back very soon.


Browser compatibility : IE/Firefox/Chrome/Opera/Safari/Maxthon/Netscape
Copyright © 2014 Firecoresoft Studio All Rights Reserved