You may notice that iOS beta now allows you to install iOS 8 beta even without a developer account or registered UDID. The only important step you should keep in mind is that you have to click the Update button instead of Restore in iTunes. If you fail to follow this step (you click the Restore button but not the Update button), an activation error will appear when installation completes.
Have got an iOS 8 activation error? Don't worry! You can easily fix the iOS 8 activation issue by either register your UDID with a developer account (buy or borrow an account), or simply restore the firmware. And here, we will list you the free and easy workaround to restore the firmware and fix the activation error on iOS 8.
Before you can fix the iOS 8 activation error, you have to downgrade your device from iOS 8 beta back to iOS 7 first. To do so, you can refer to the guidelines below:
1. Download the most recent iOS 7 firmware from a third-party download center like this, and save it on your desktop for easy access.
2. Launch iTunes on your Mac/PC.
3. Connect your device with your computer and then enter DFU mode (NOT recovery mode). Once it's in DFU, return to this guide to complete the downgrade.
4. Click OK when you see the pop-up message saying "the device can't be used until it's restored."
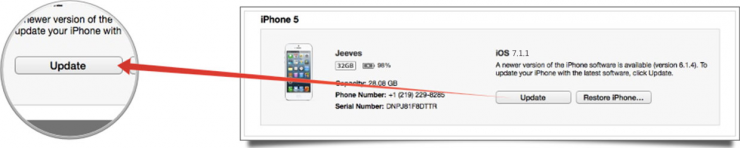
5. Press the alt/option key (or Shift key for Windows users) on the keyboard, and then click Restore iPhone in iTunes.
6. Go to the iOS 7 firmware you just saved in the first step and click Open.
7. iTunes will automatically do the rest for you.
Now your device should successfully reboot and downgrade to iOS 7. If you still want to update to iOS 8, keep on reading this post.
1. Plug your device to your computer and then launch iTunes.

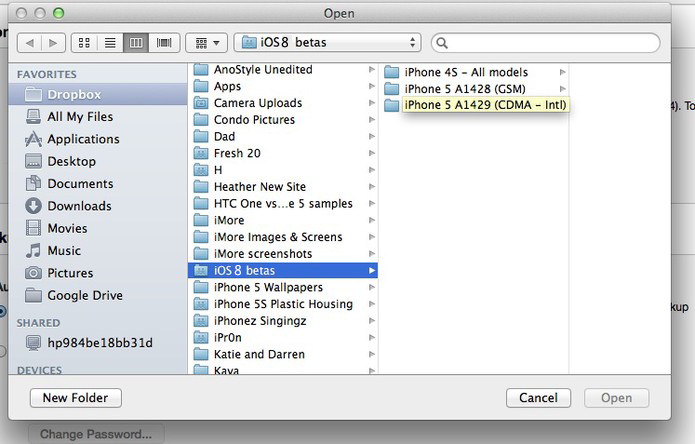
2. Go to the device options, press alt+option on the keyboard (or Shift on Windows keyboard), and then click Update.
3. Now select and open the iOS 8 firmware you downloaded from the developer portal.
4. iTunes will automatically finish the update for you.
That's all and the activation issue should be fixed if you follow the steps above. Let us know if this works for you in the comments.


Browser compatibility : IE/Firefox/Chrome/Opera/Safari/Maxthon/Netscape
Copyright © 2014 Firecoresoft Studio All Rights Reserved